Pão de Queijo
Crunchy highly addictive traditional Brazilian Cheese bread

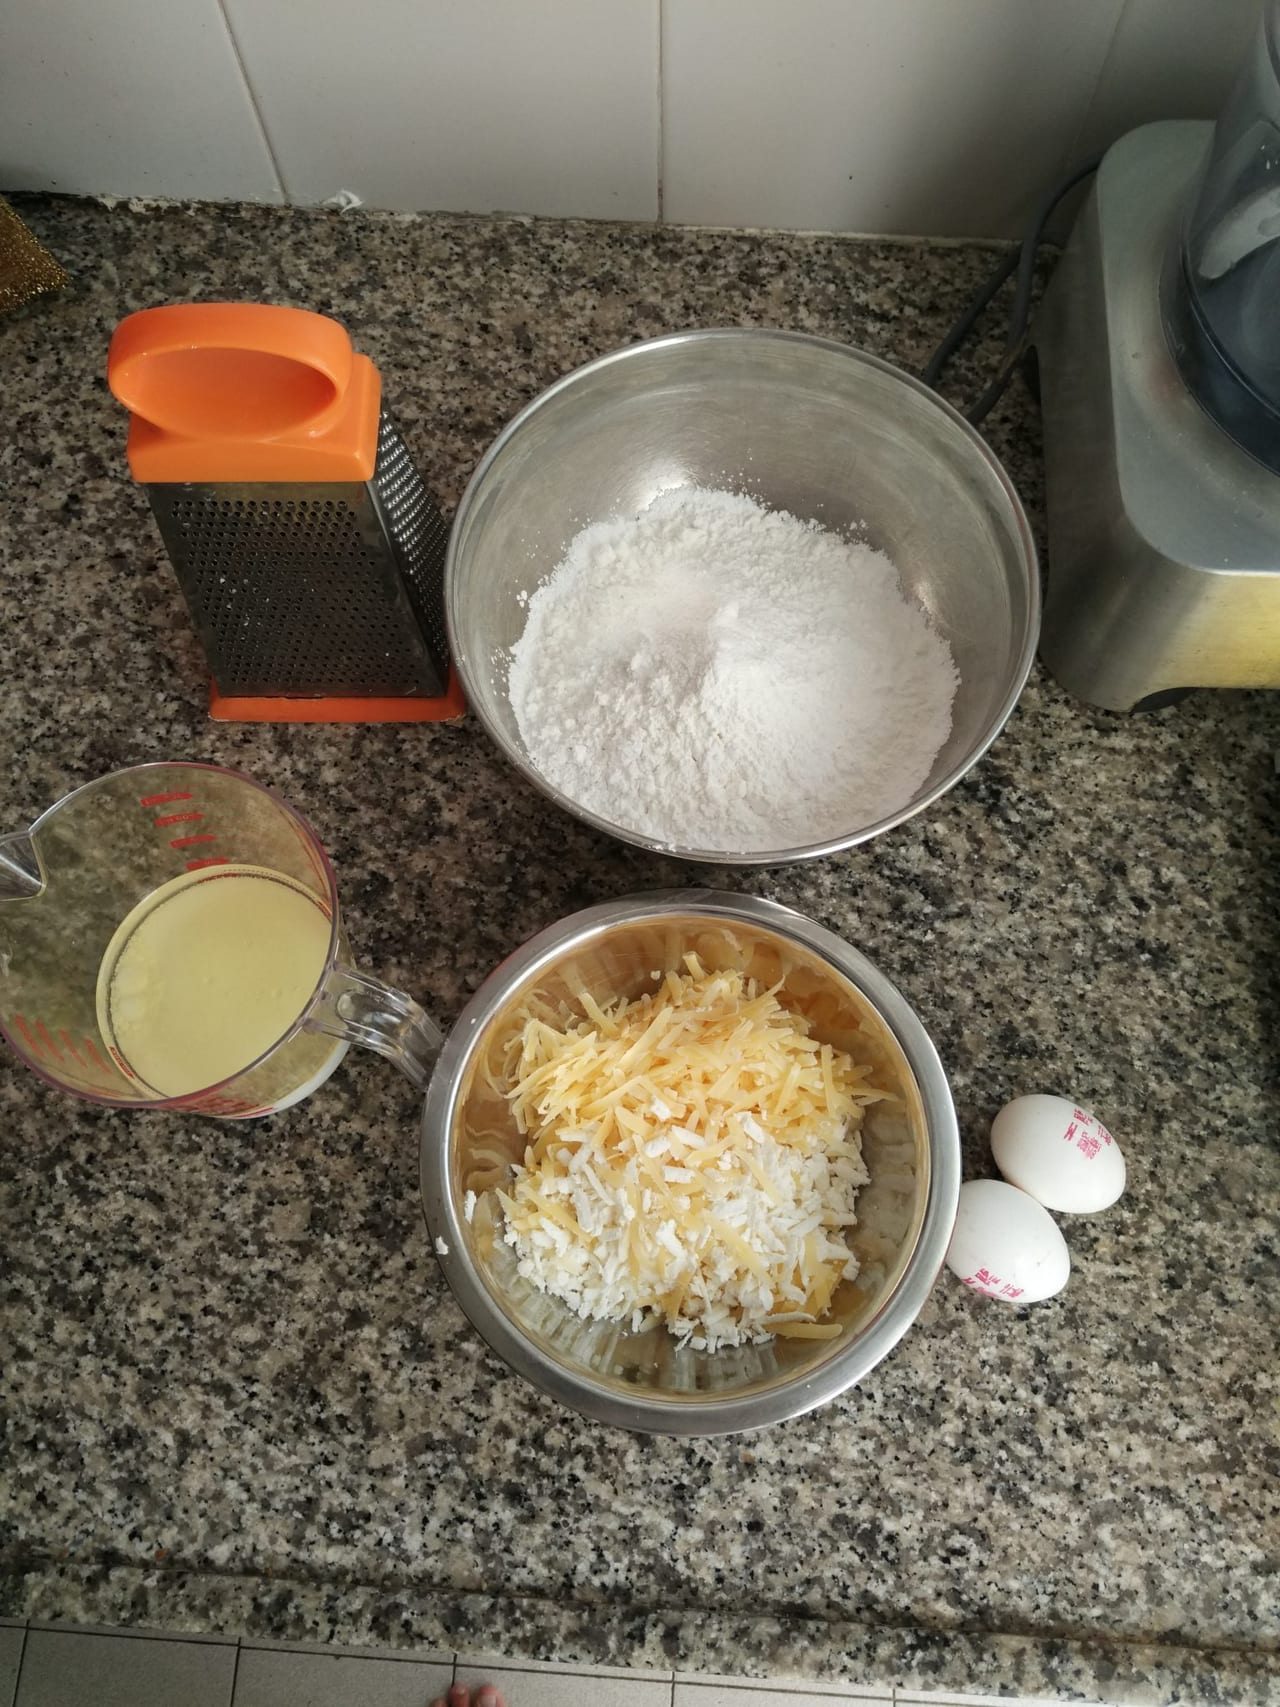
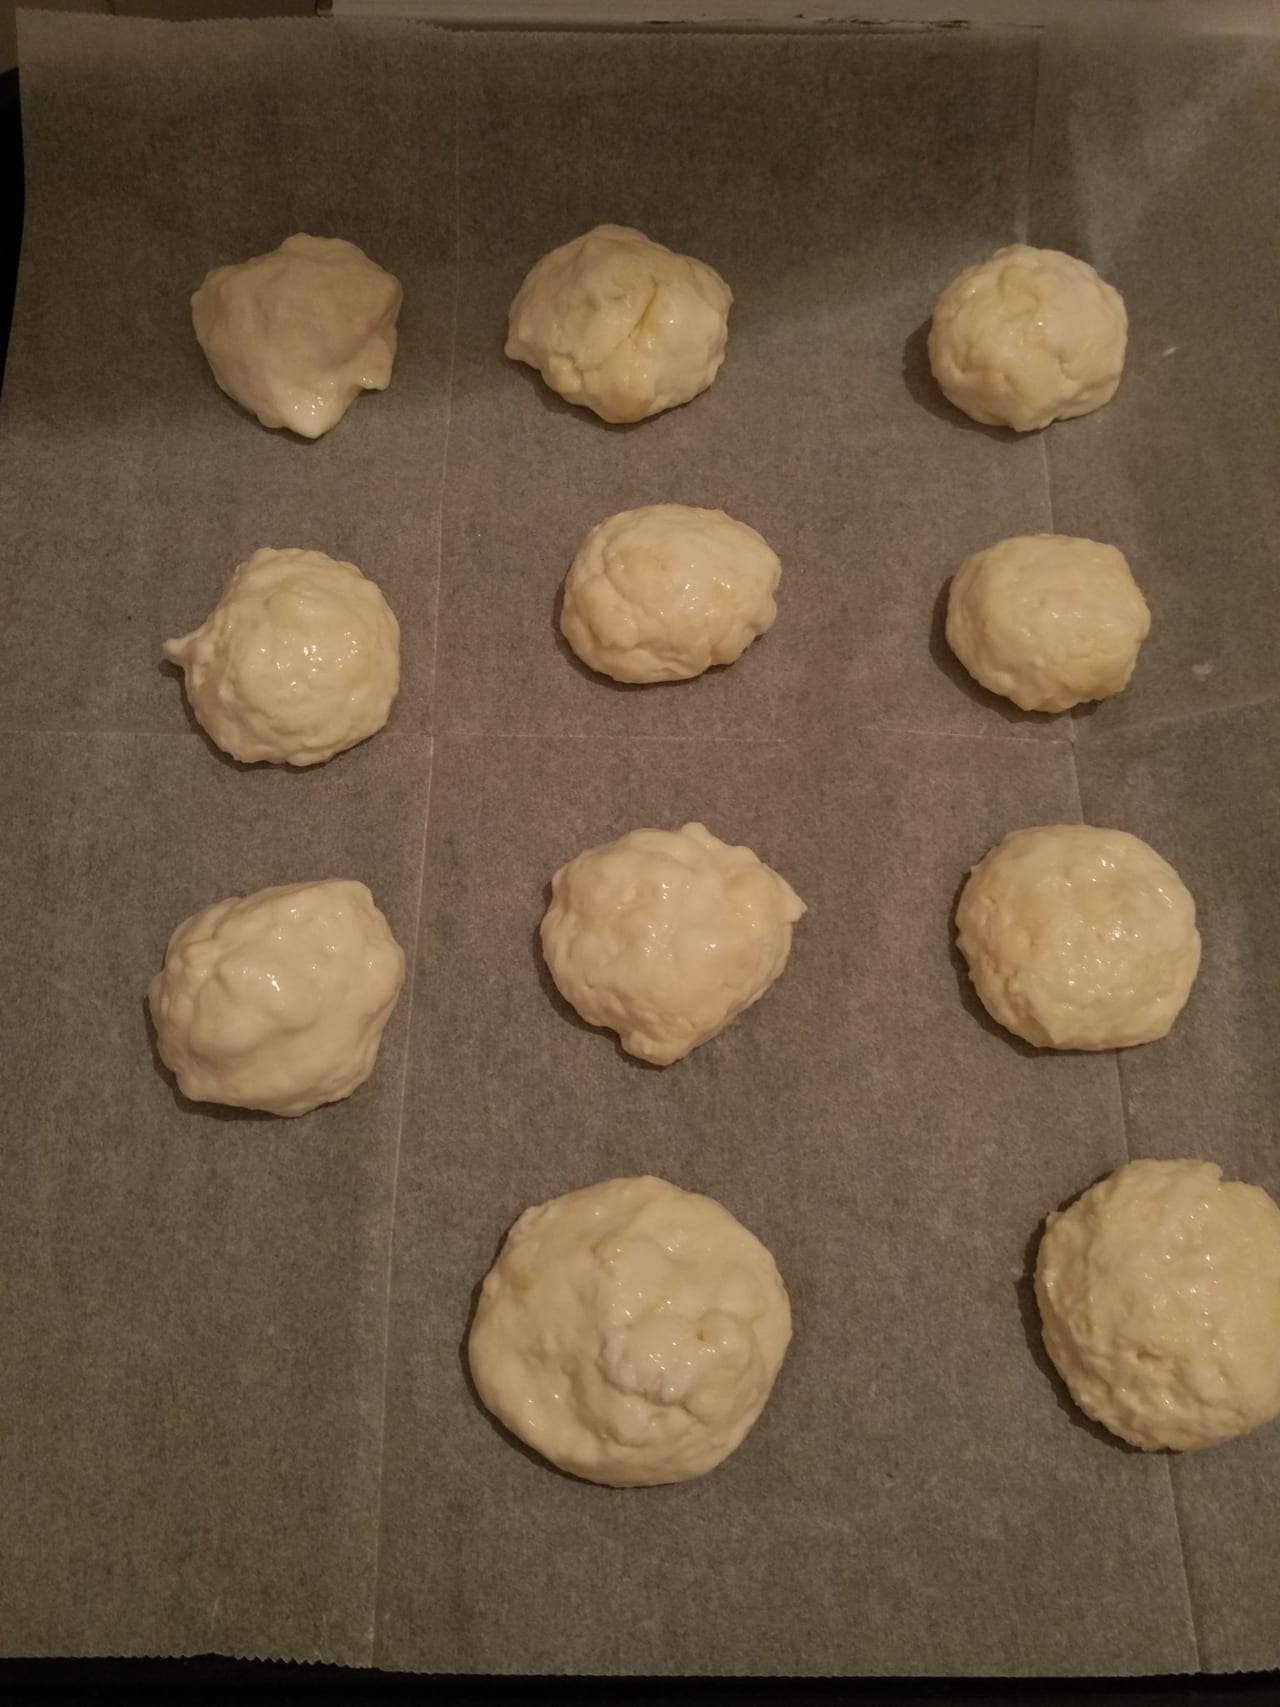
Pão de Queijo batter
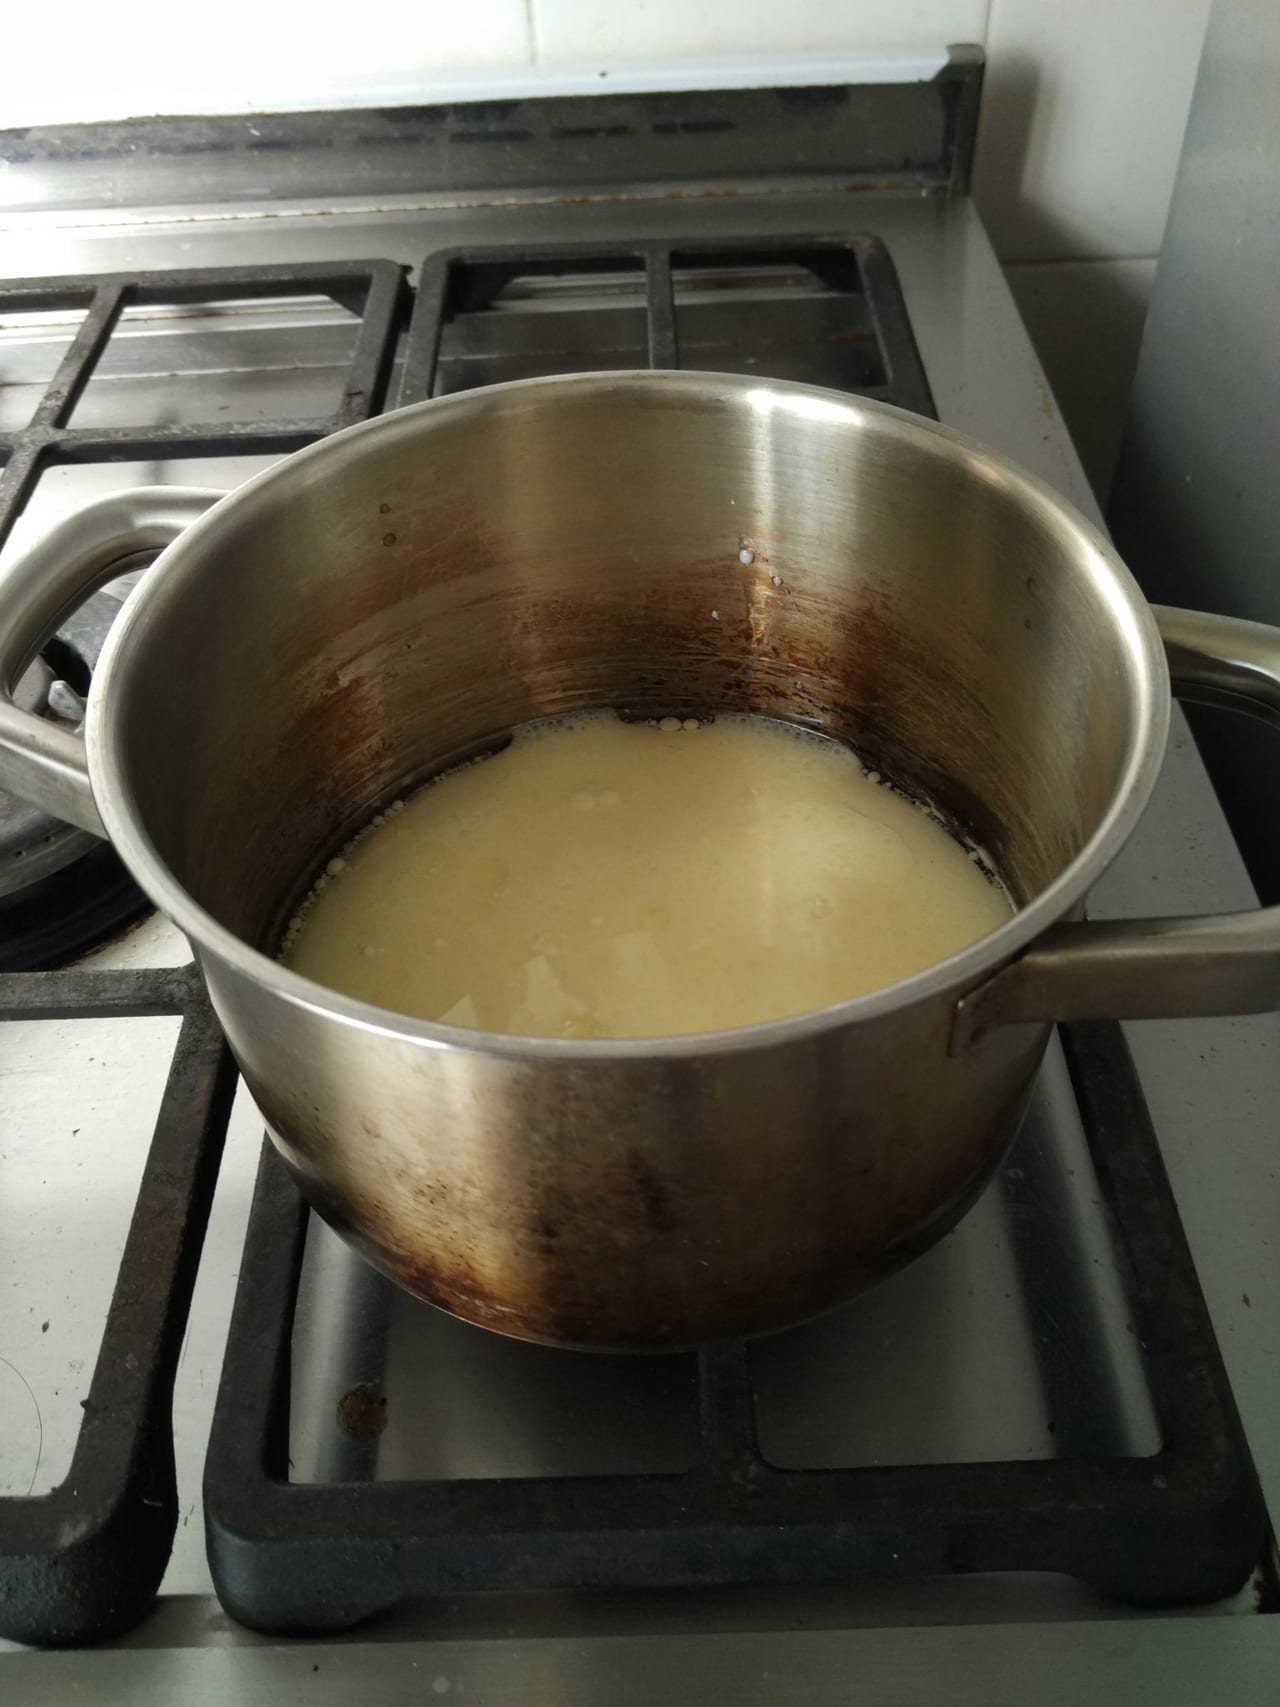
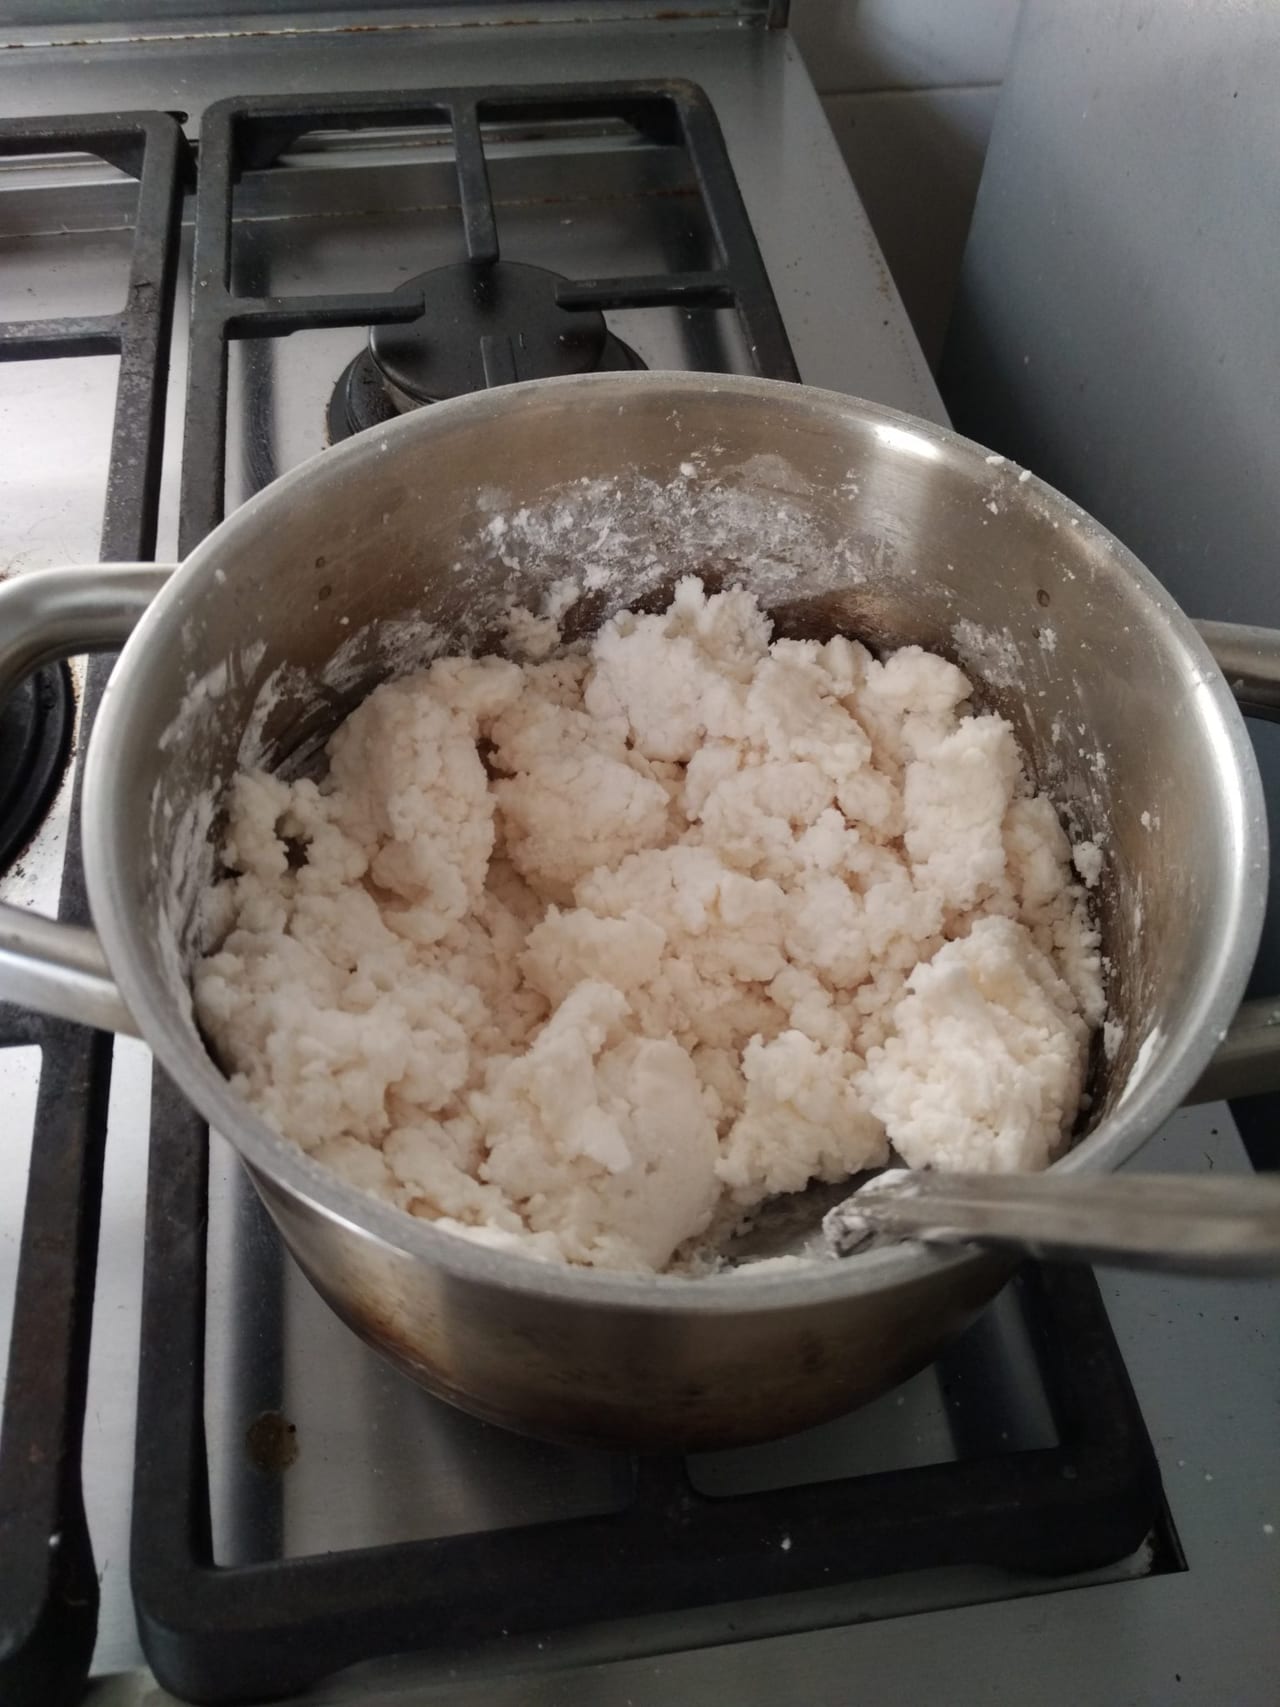
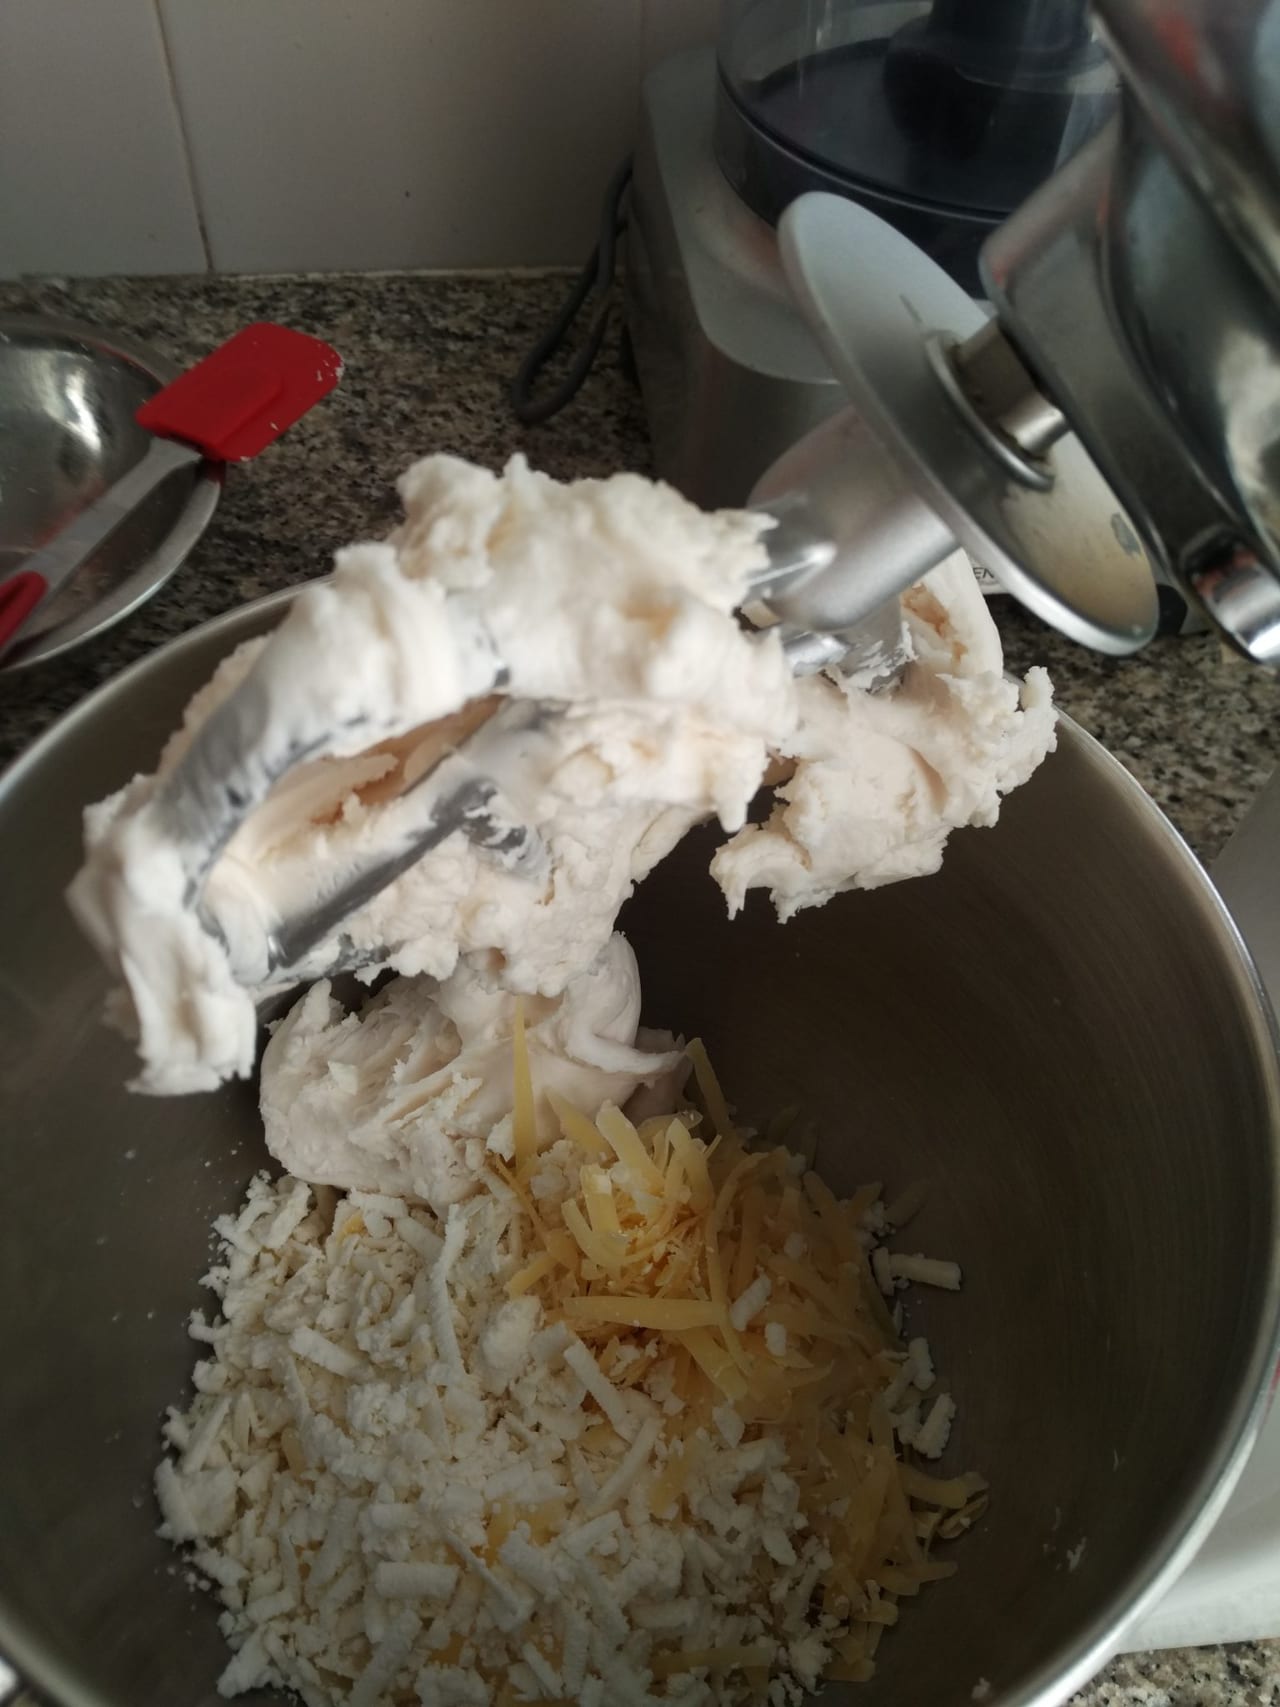
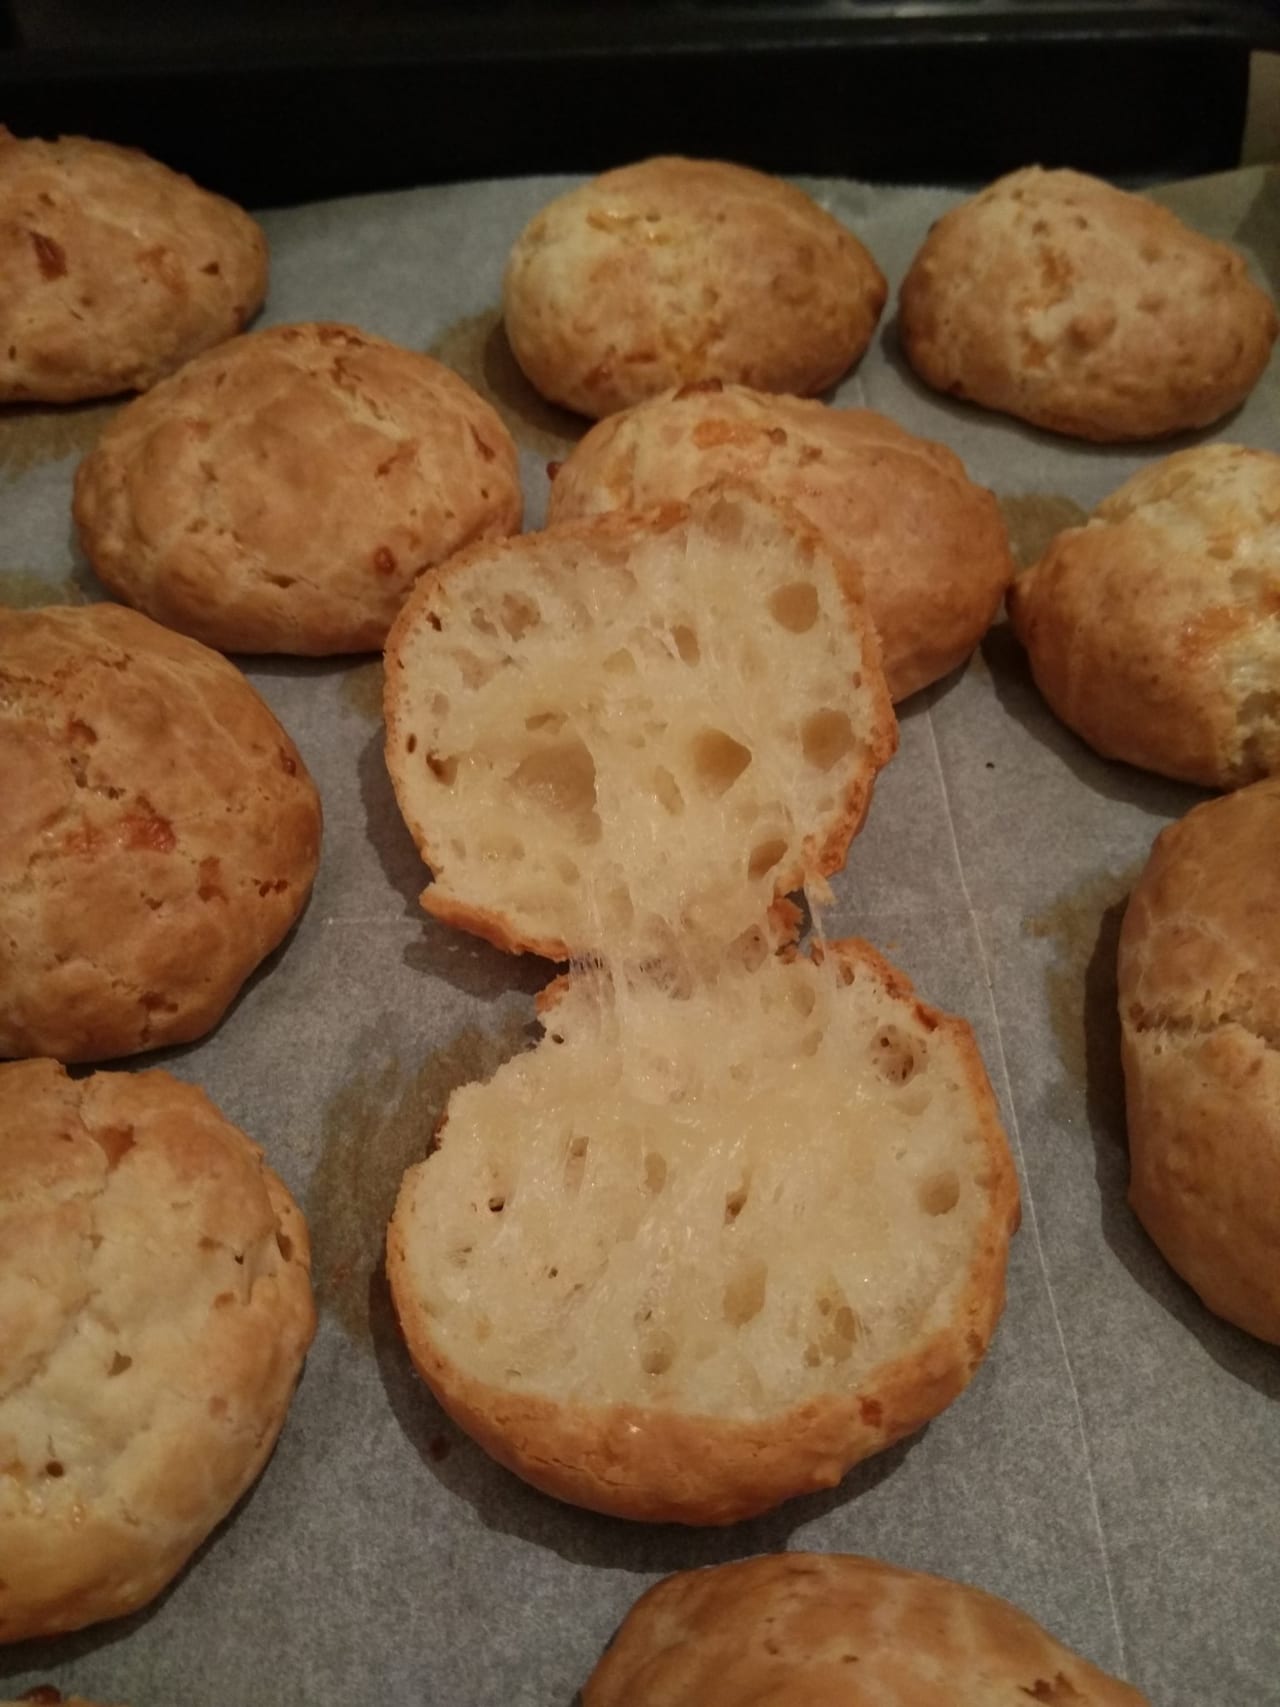
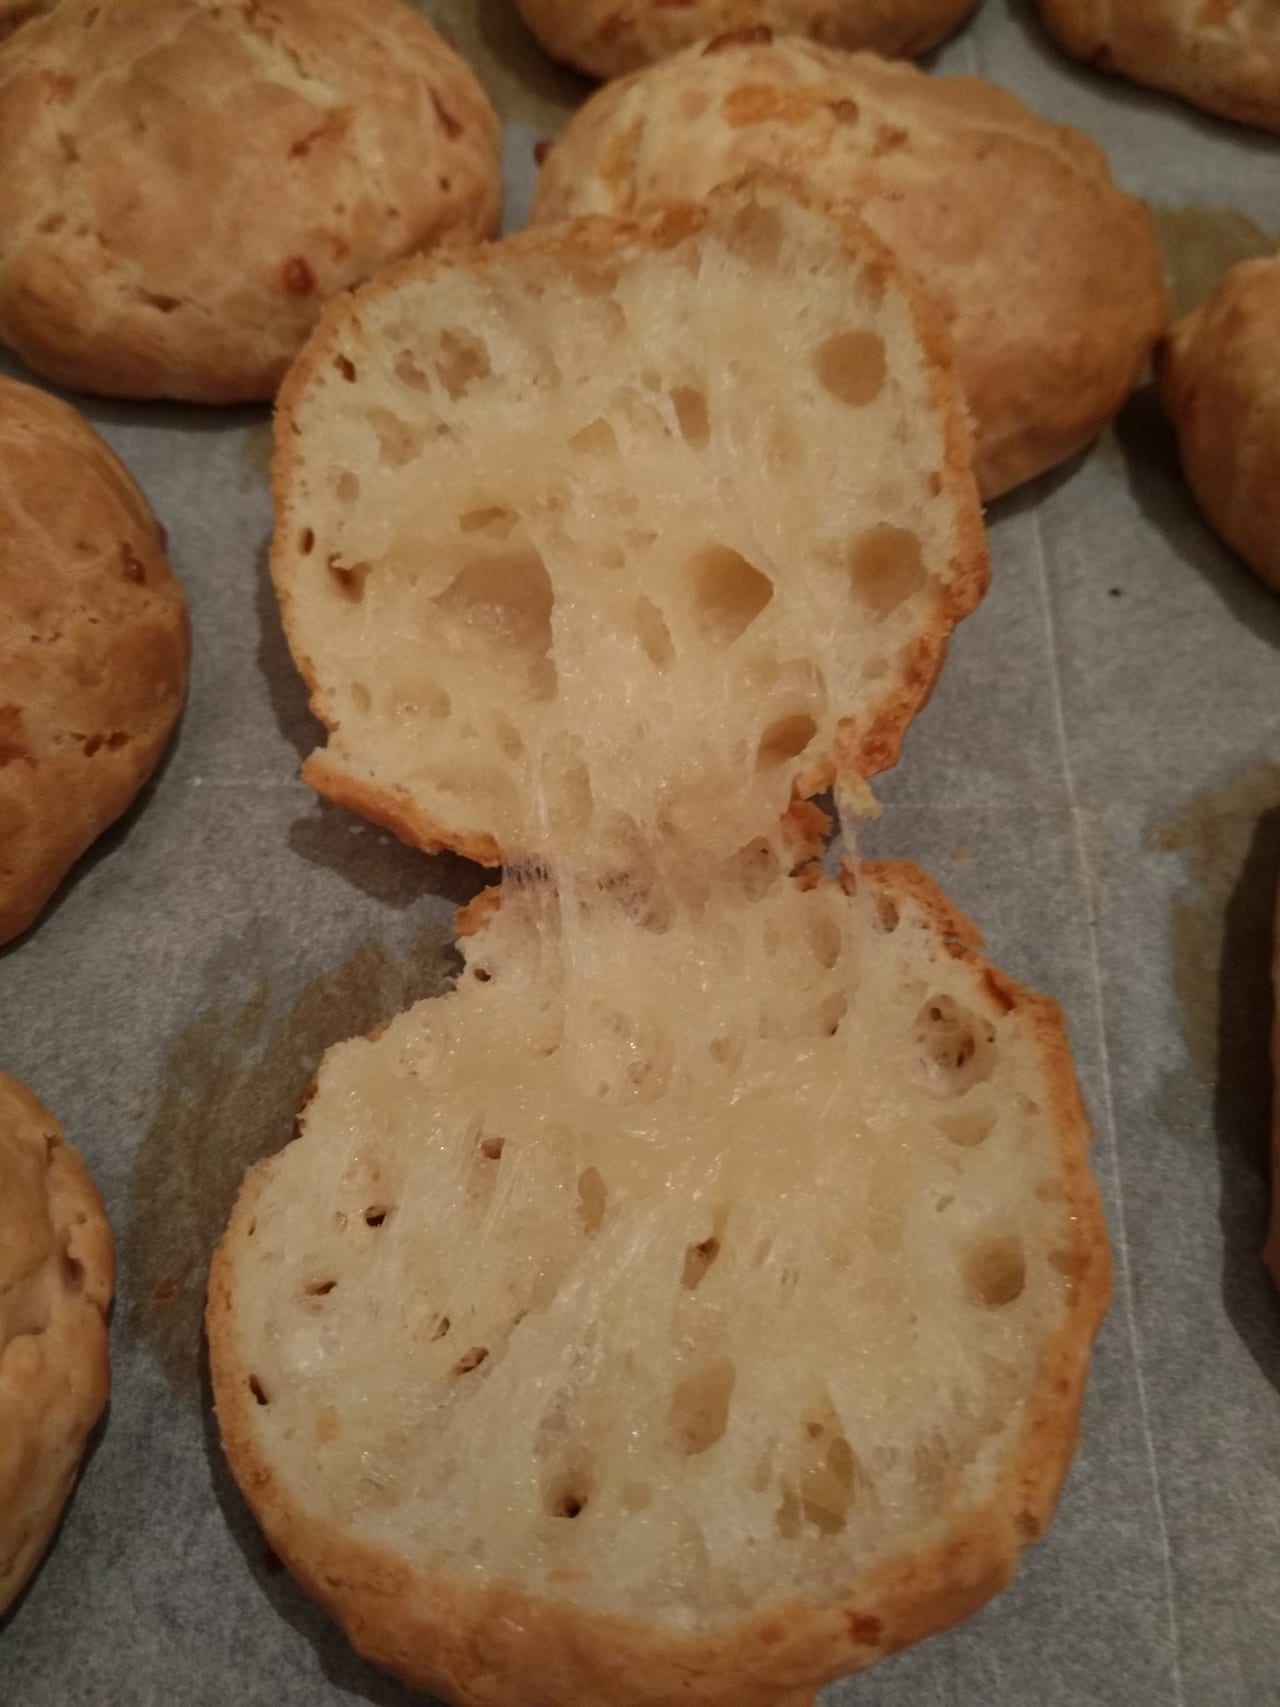
There's no wheat flour in Pão de Queijo — the main ingredient is tapioca flour. Tapioca is a strange kind of flour. When mixed with warm milk and oil, the texture becomes very sticky, with a flexibility that resembles bubblegum. I highly recommend working with a stand mixer unless you want a good workout. This dough is seriously strong, and when you add the eggs they need to be fully incorporated. The process reminds me a bit of the French Pâte à Choux dough. It's the same idea — you heat up the wet ingredients and mix them with the dry ones, stirring constantly while adding the eggs, to build the texture you're after.
Say cheese
The original recipe calls for "Queijo Minas Curado", a soft cheese from Minas Gerais.For those of us not living in Minas Gerais, there are other options. Any semi-firm cheese will do — Monterey Jack, kashkaval, or even cheddar are all great.
It's also popular to use mozzarella (great texture) and Parmesan for a strong, cheesy flavor.
Baking Pão de Queijo
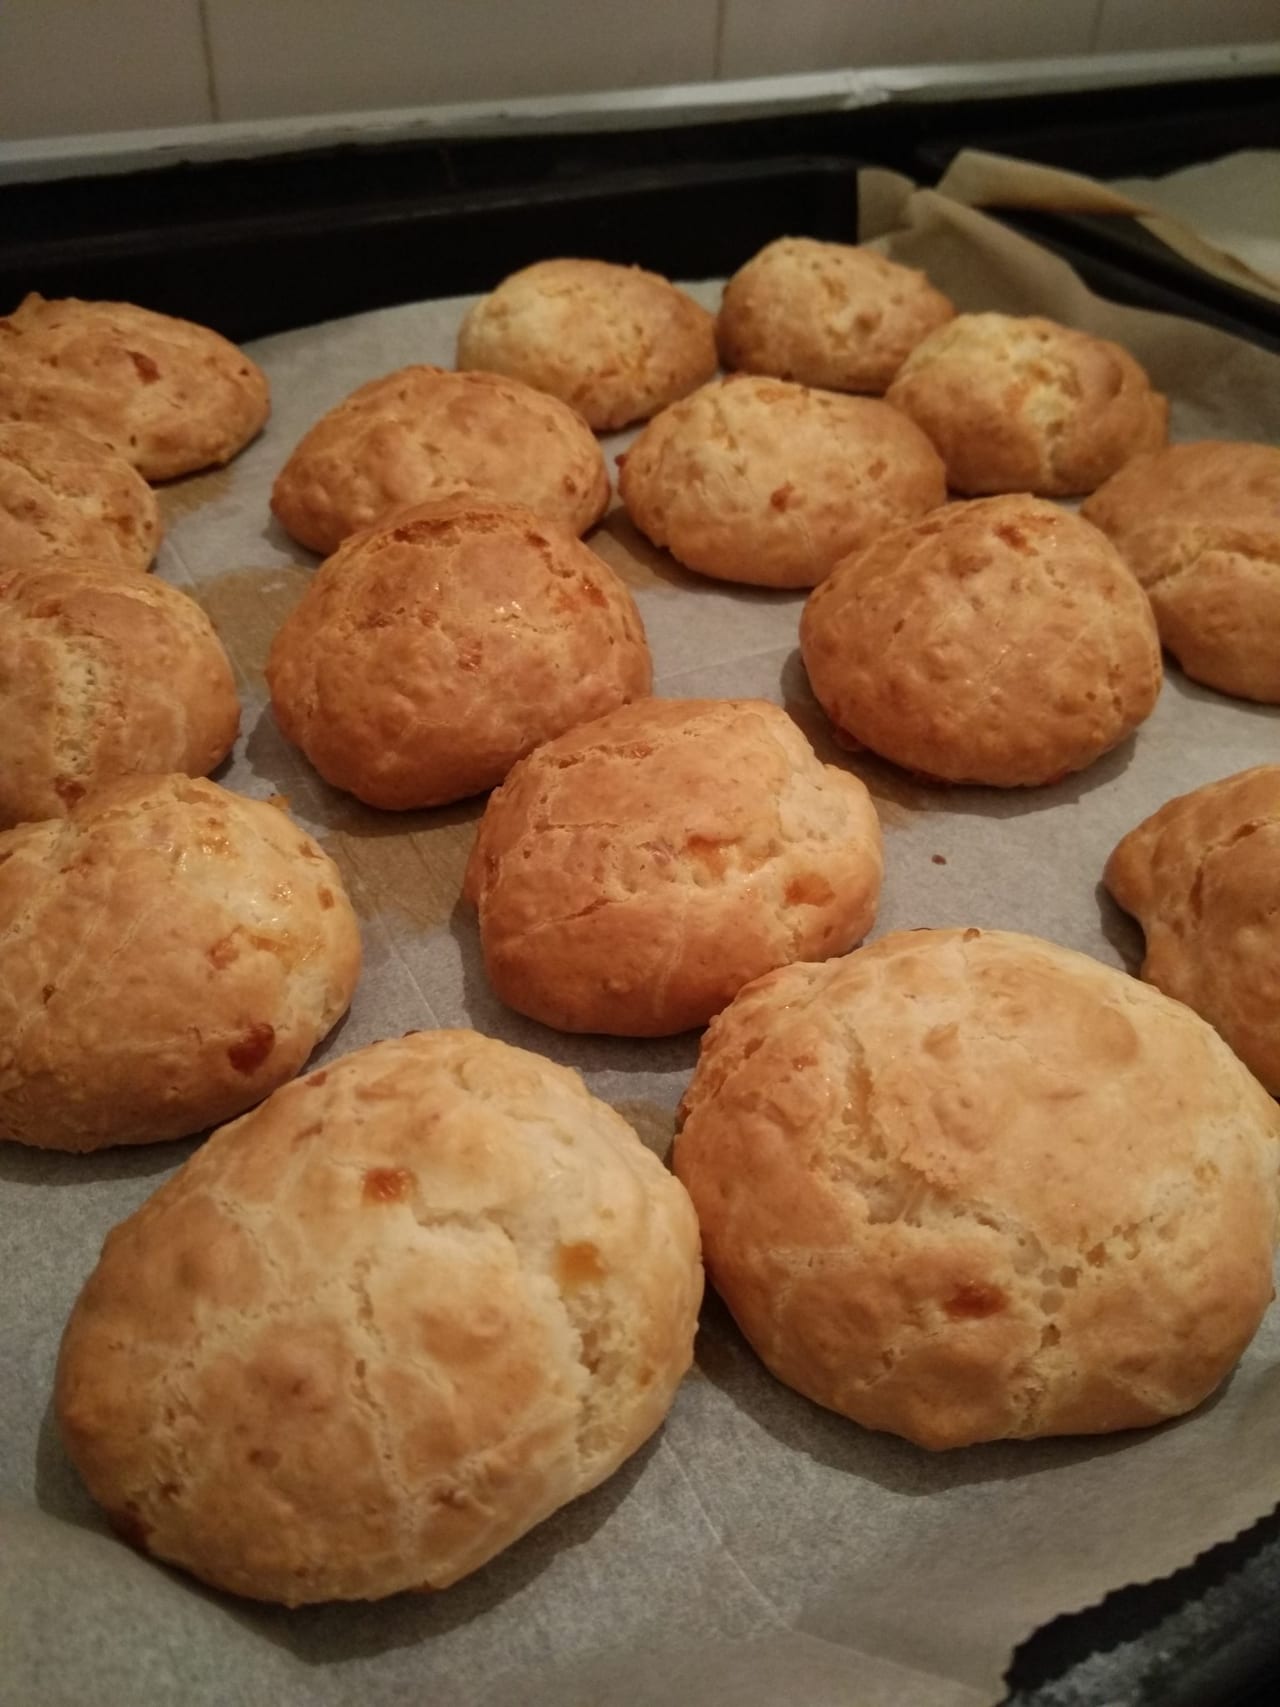
Bake at 180°C/360°F for about 30 minutes. The little balls will puff up in the oven, so keep them a few inches apart. They don't have to be golden brown — pale white is the traditional color. That said, I like mine crispy and golden brown, but it's a matter of taste. If the dough is a bit runny when you try to shape them on the baking pan, refrigerate the batter for about 20 minutes. This will stabilize it and you'll be able to roll perfect balls.
Method
- 1
Boil the Milk and Oil
Combine the milk, oil, and salt in a saucepan, Whisk Occasionally bring it to a gentle boil over medium heat. As it comes to a simmer remove from the heat and add the tapioca flour, stir vigorously until dough starts to incorporate.

- 2
Mixing the Dough· 5 minutes
Transfer the dough to the bowl of a standing mixer fitted with a paddle attachment. Start mixing the dough on a medium speed for 1 min, add the eggs one at a time until fully incorporated, add the cheese and mix for another minute. At this point I usually let the dough rest for 30 minutes in the fridge, it helps shaping the balls later on since the dough is very sticky however you can skip to next stage as well.


- 3
Baking the Puffs· 30 minutes
Preheat the oven to 180°c/360°F . To shape the Puffs, wet your hands with water or oil, spoon the dough onto a baking sheet in, 4cm/2 inch apart (you can also use an ice scream scoop or regular spoon). Bake for 30 minutes until crisp and golden.


Jaron Kimhi
Jaron Kimhi — self-taught home cook from Tel Aviv, writing and cooking every recipe on this site himself. 20+ years of tinkering in the kitchen, leaning toward slow cooking, classic technique, and honest ingredients.
More recipes by Jaron →


