Homemade Turkey Pastrami
Dutch Oven and spice rub mix homemade Pastrami

The amount of chemicals in these industrial pastramis and sausages is huge. It's essential for commercial companies to add all sorts of preservatives to prolong the shelf life of the meat and keep it fresh in color and texture. Thing is, I just love a good pastrami in a sandwich or as an appetizer and can't give it up that easily — that's why I decided to make it at home. And guess what? It's better than the store-bought version.
In fact, if you knew how easy (and cheap) it is to make homemade pastrami, you wouldn't go anywhere near the industrial kind — not to mention the taste is so much better.
Homemade turkey pastrami key points
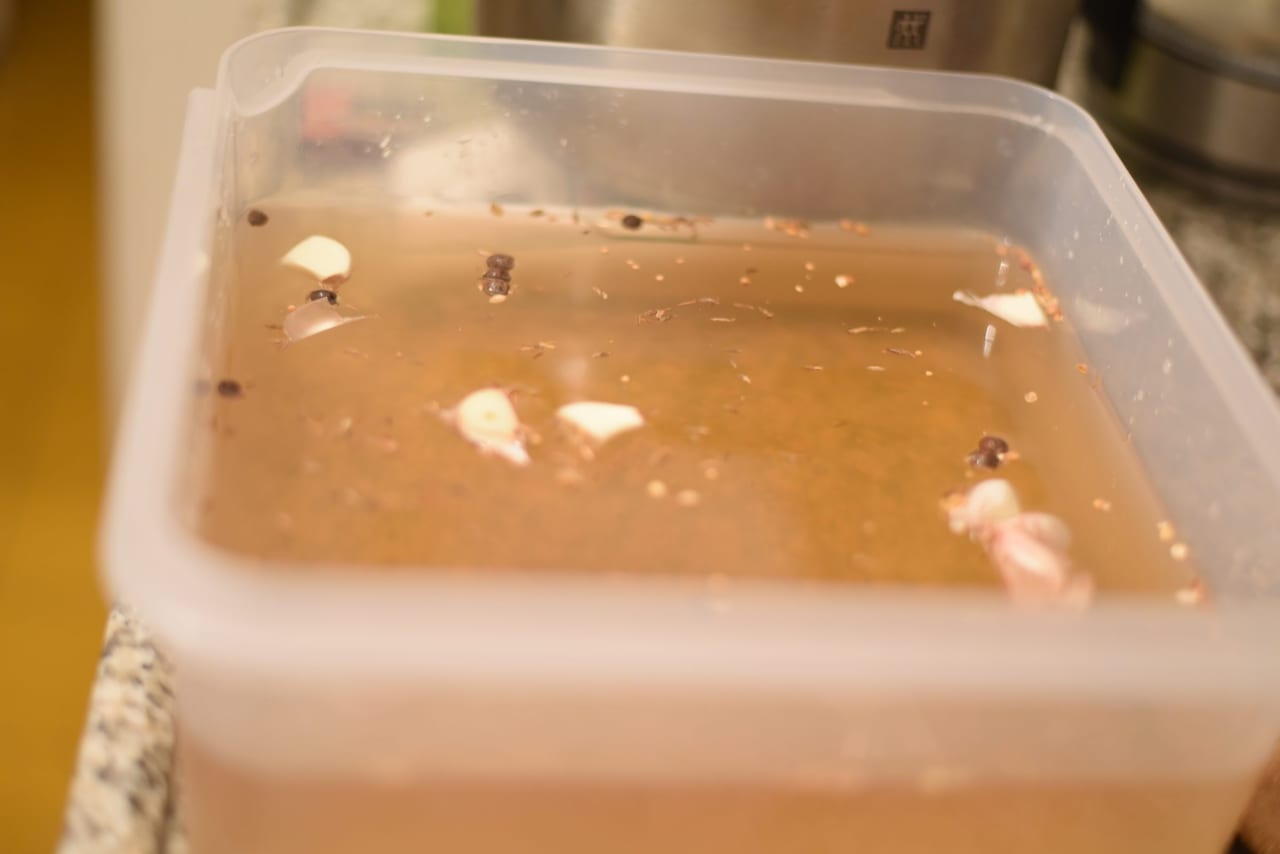
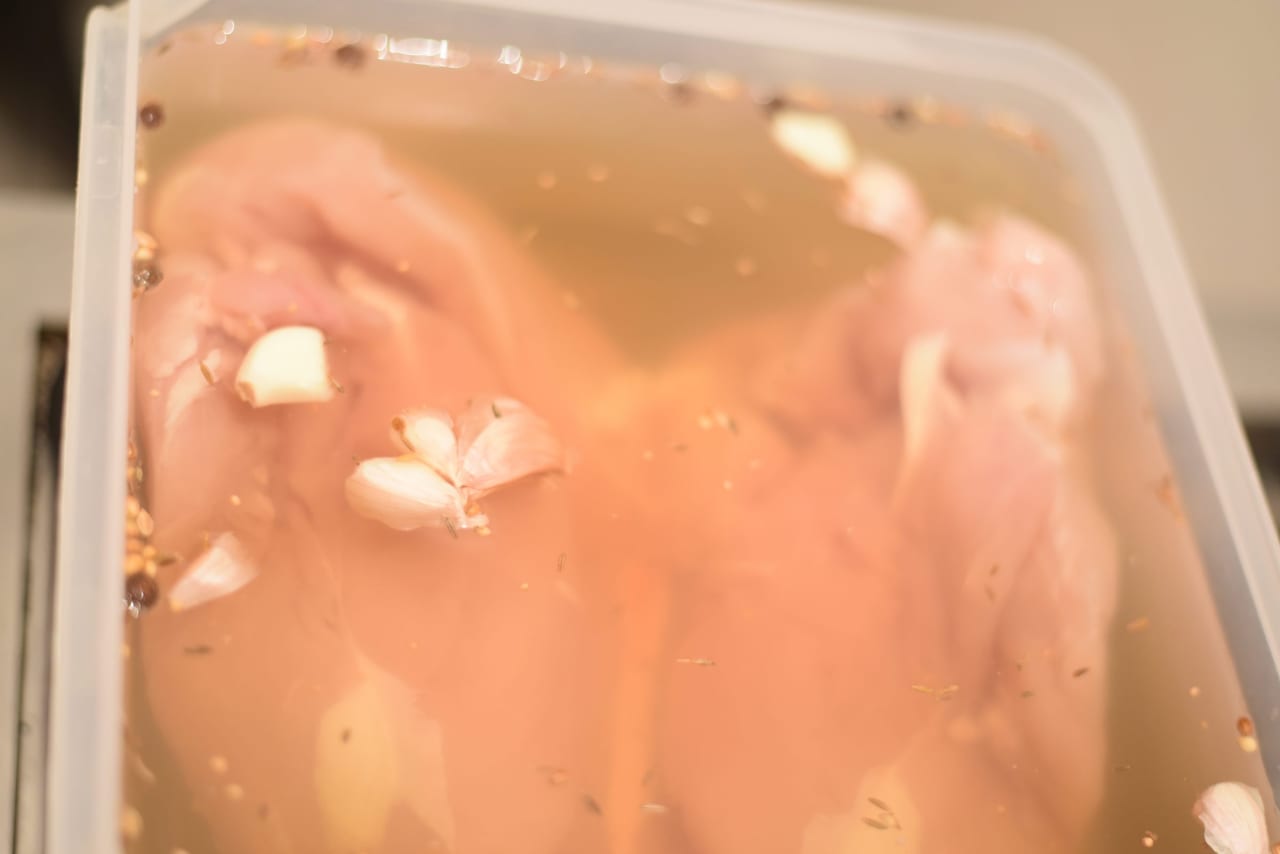
The first step that separates the amateurs from the pros is the brine. Hold on — don't run on me now. It's a big name for a quick and easy process that involves adding water, sugar, salt, and some spices. That's it. Five minutes of your life.
The Rub
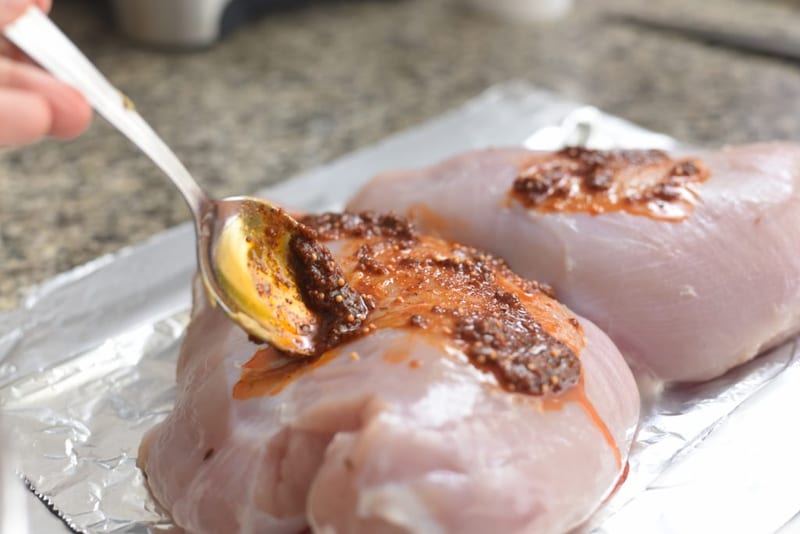
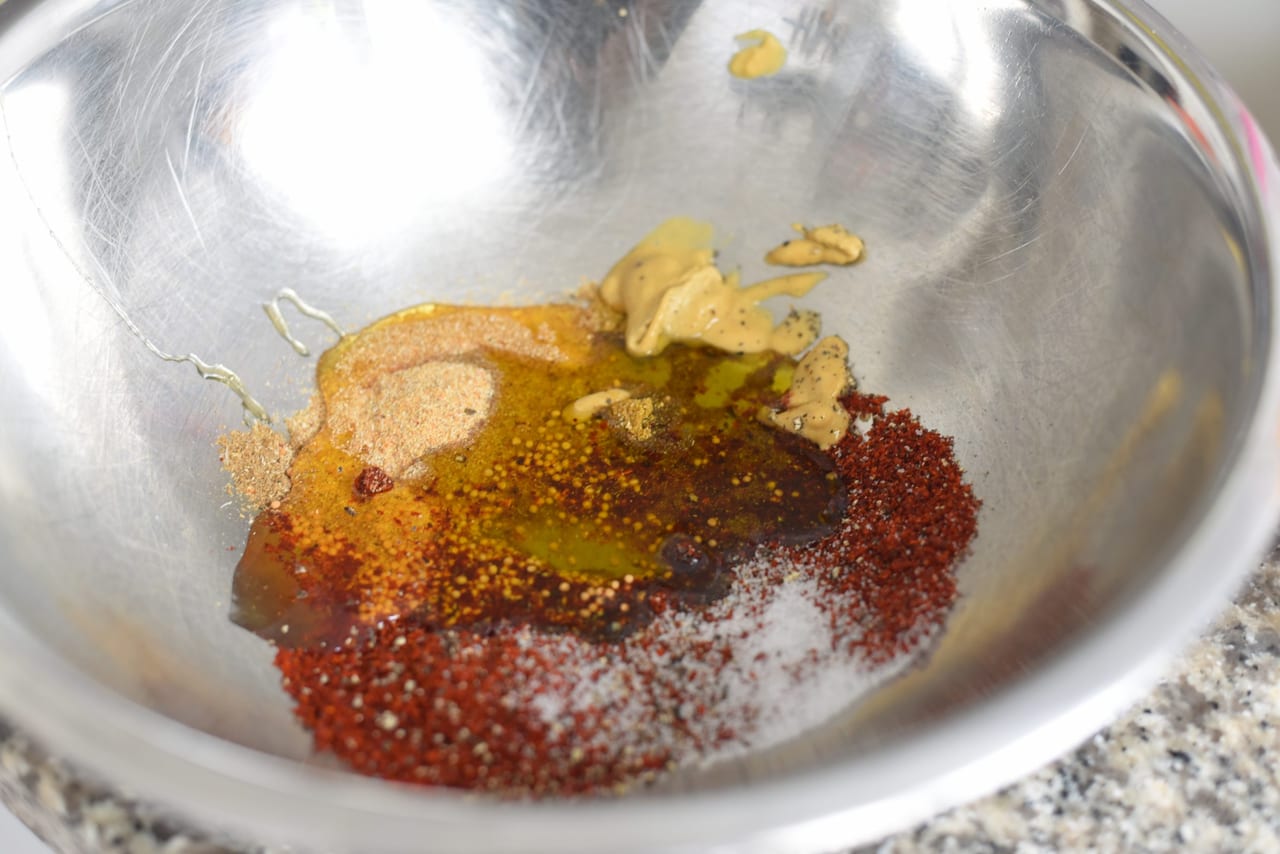
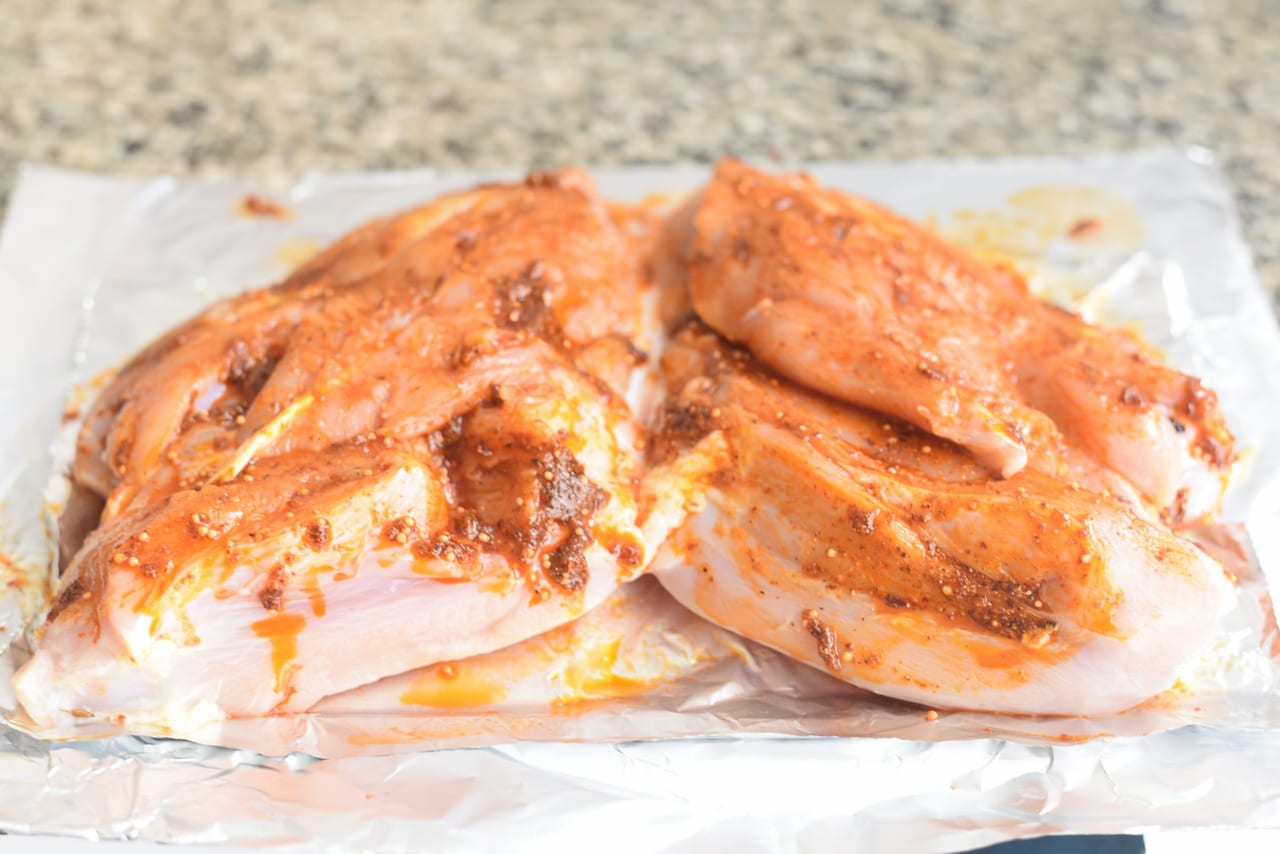
There are various rub mixes for turkey pastrami — it really depends on your personal taste. For this turkey, I chose a relatively aggressive rub that complements the neutral taste of the turkey.The rub consists of various spices such as smoked paprika, cumin, mustard, black pepper, and ground coriander seeds, as well as olive oil, water, and date honey.
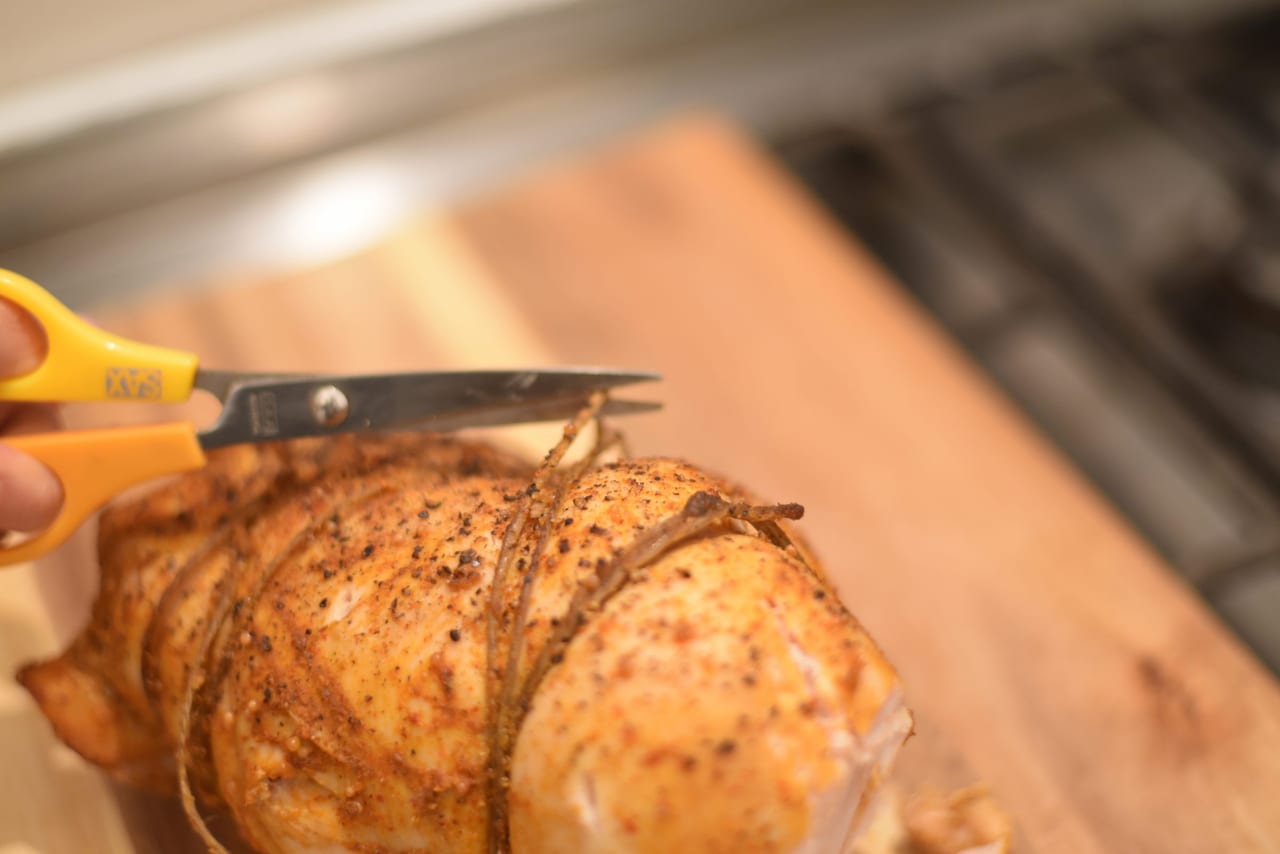
Tying the bird
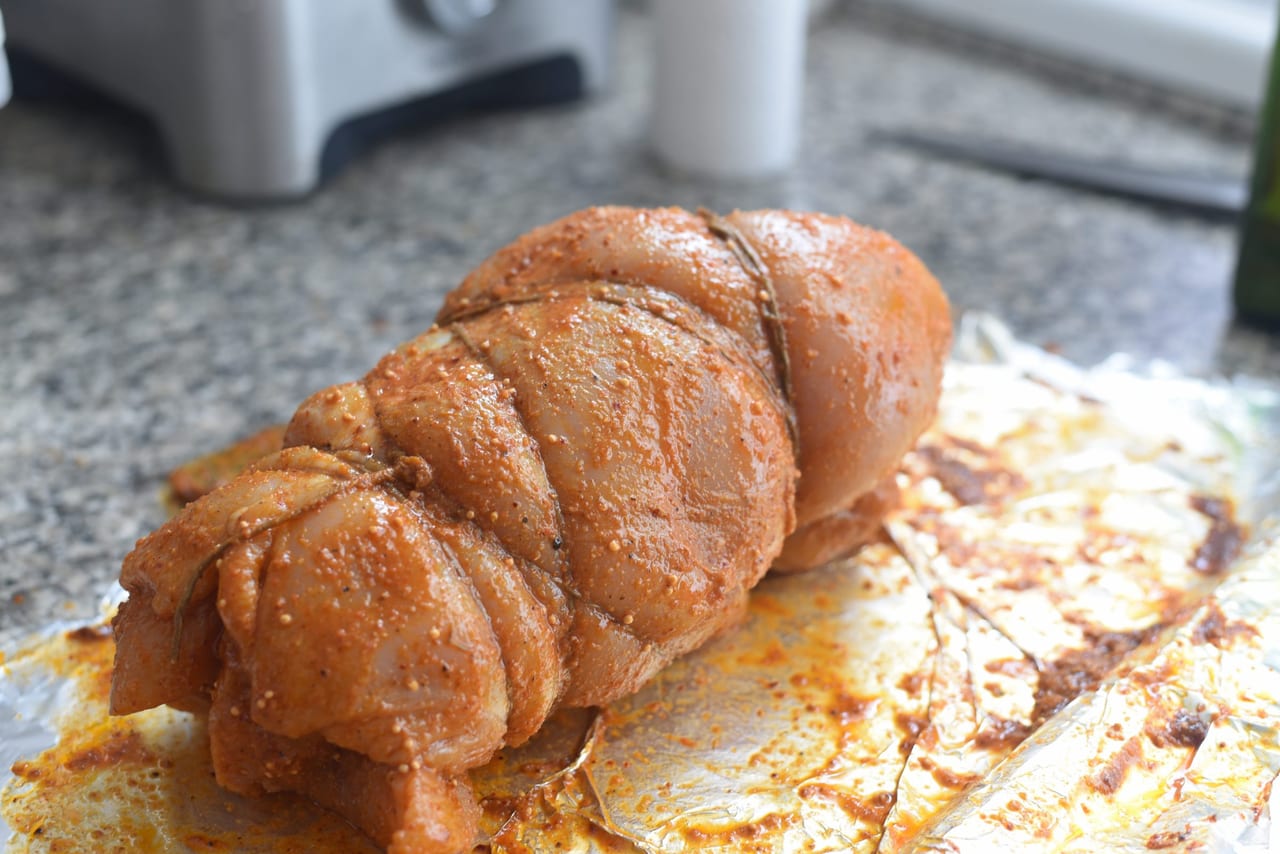
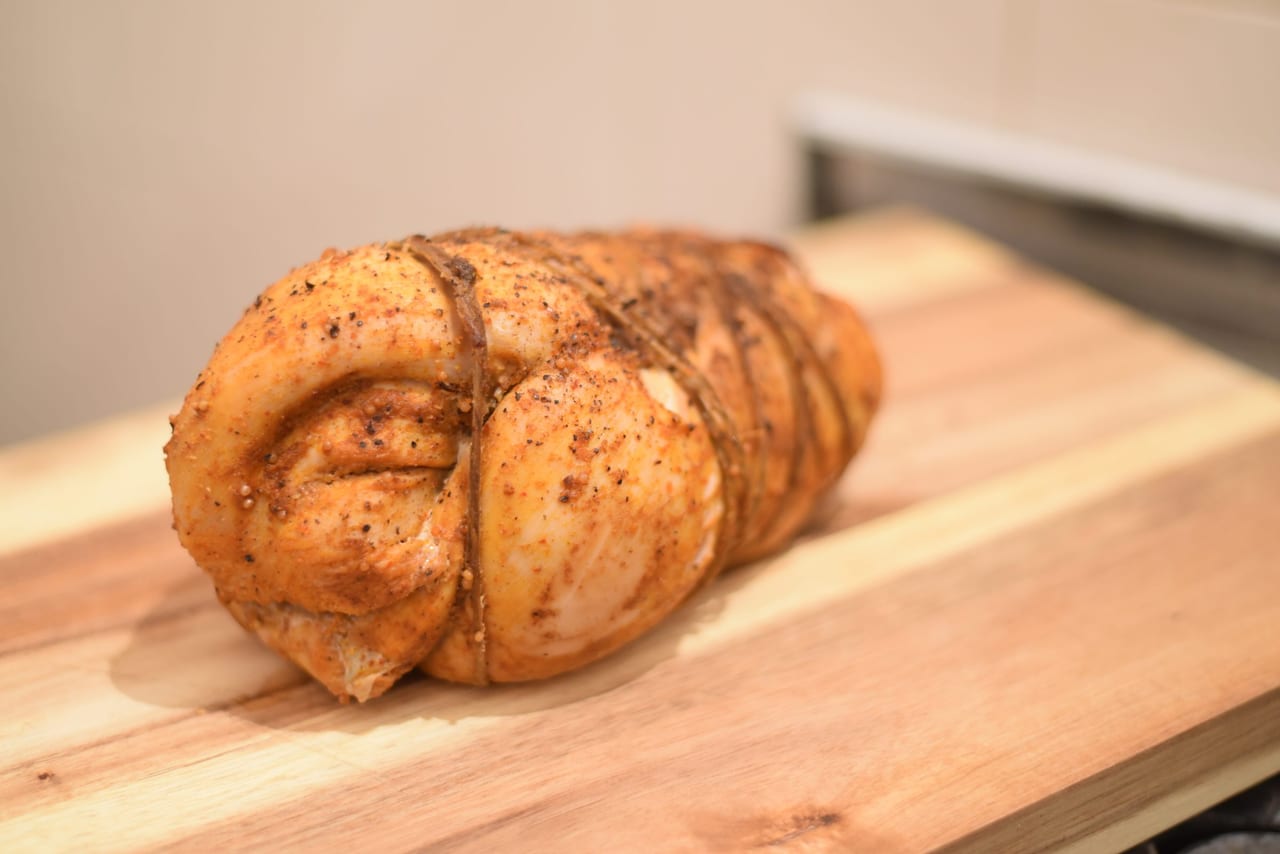
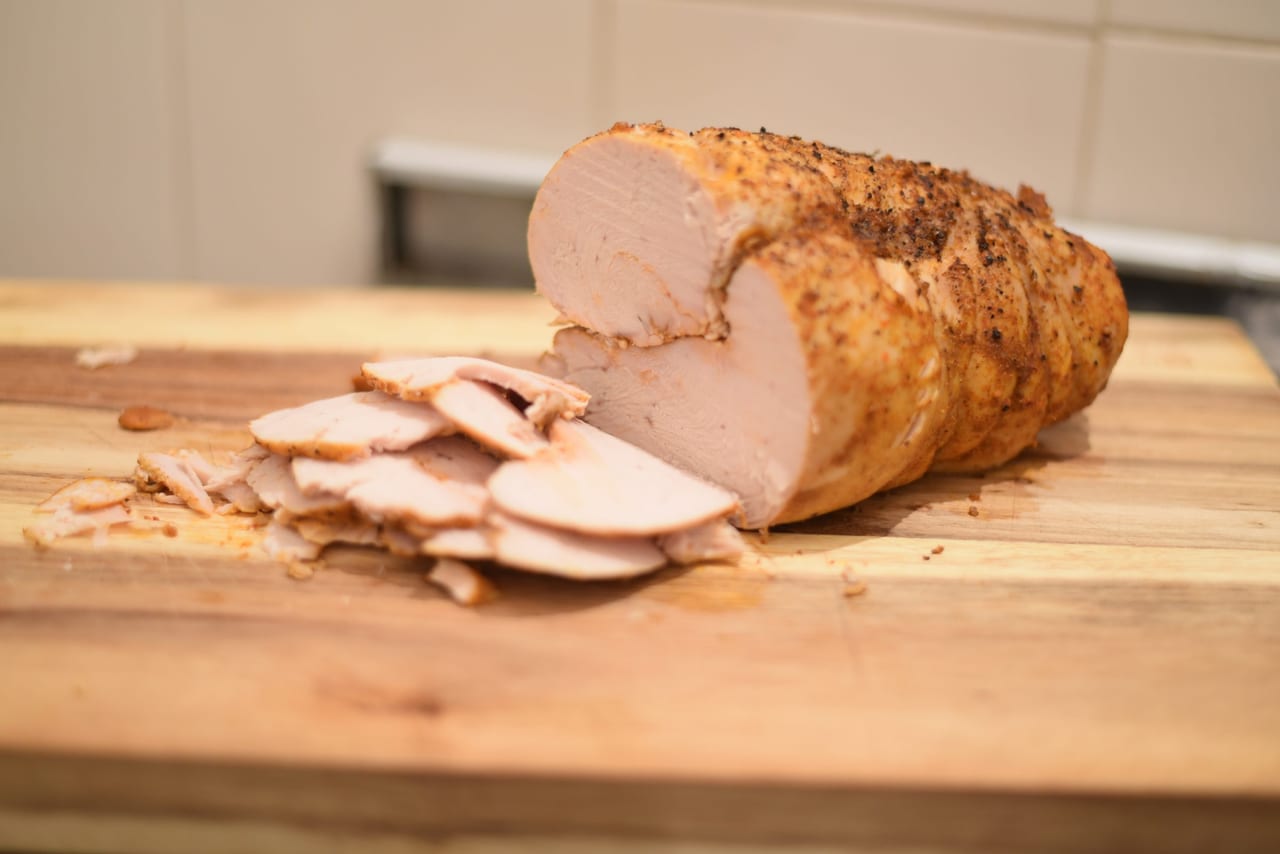
When you get a big turkey breast, keep in mind that the bigger the outer surface in direct contact with heat, the dryer the meat will be. That's why we need to create a bigger "inner" surface for the pastrami — and tying the bird is the best option, both flavor-wise and visually. Any knot will do. I like the Continuous Knot, where you use one piece of string and wrap it firmly around the turkey, making sure it holds the pastrami in an even loaf shape.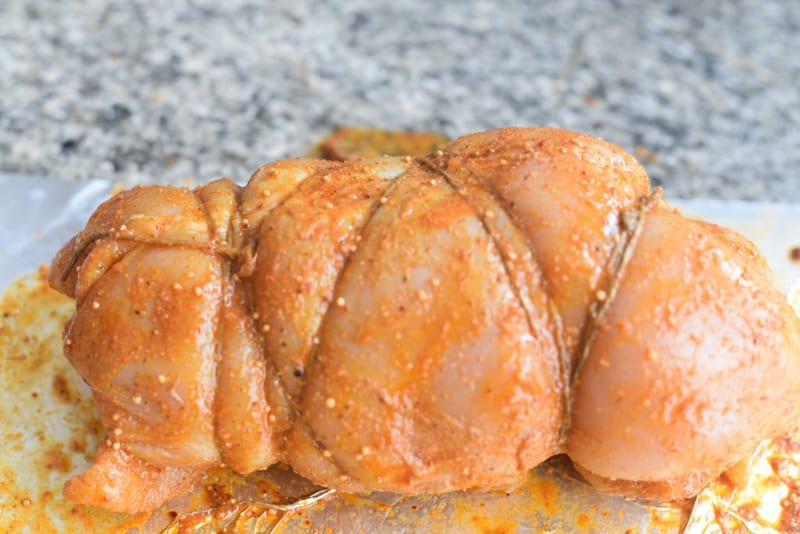
Cooking the turkey pastrami
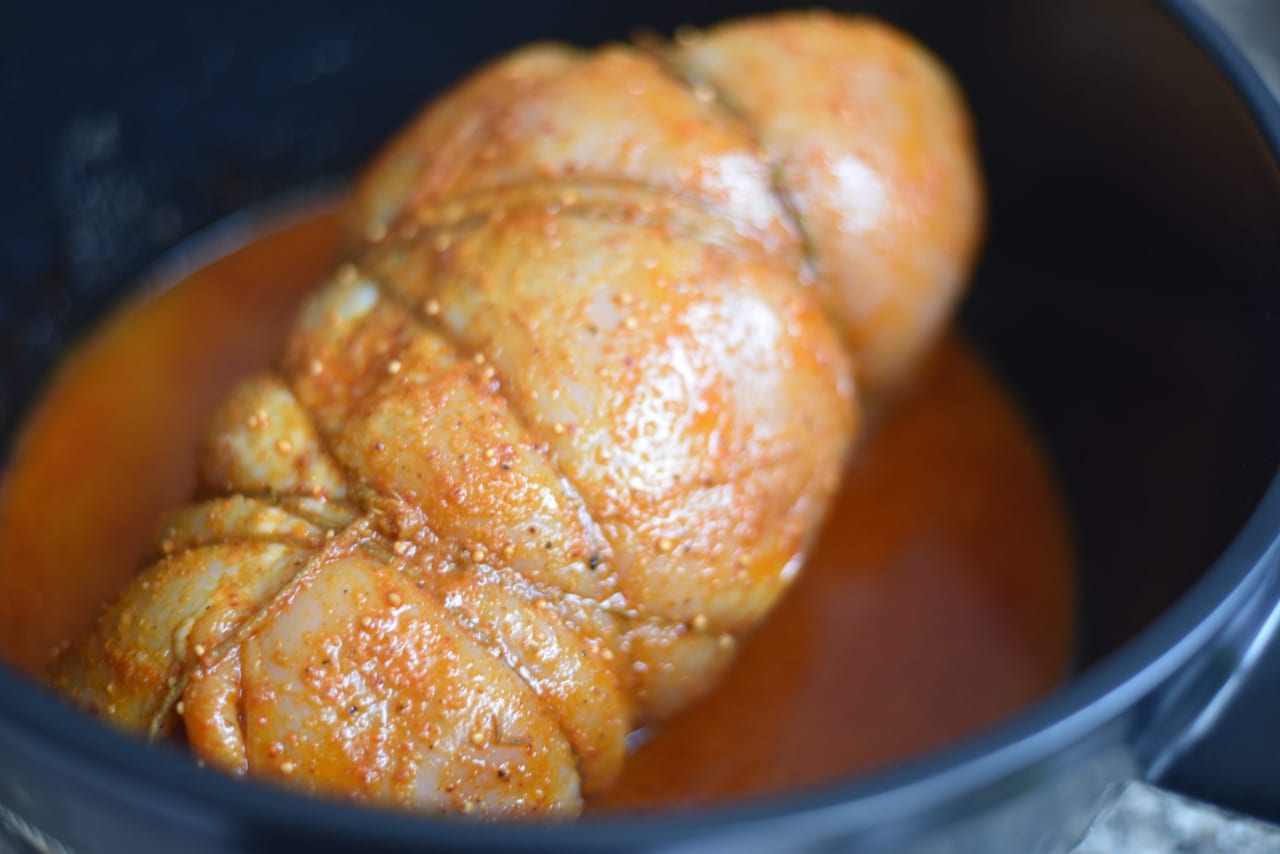
The best way to make a good pastrami is in a smoker grill — the pastrami barely loses any liquid and stays moist and tender. However, since most of us don't have smokers at home, we need a different method that keeps the turkey moist and cooks it to perfection at the same time. I'm using a Dutch oven. It protects the pastrami from getting burnt and dry on one hand, and cooks it in a perfectly even way on the other. To build steam in the Dutch oven, I mix some of the rub with water and fill the Dutch oven about an inch deep with the liquid. This prevents the pastrami from burning on the bottom and keeps the Dutch oven moist, balancing the internal temperature. The internal temperature of the pastrami should be 80°–85°C / 165°F–170°F. This gives you a moist and tender pastrami — go past that temperature and you might end up with a dry, stringy result. So it's important to use a thermometer to check the internal temperature.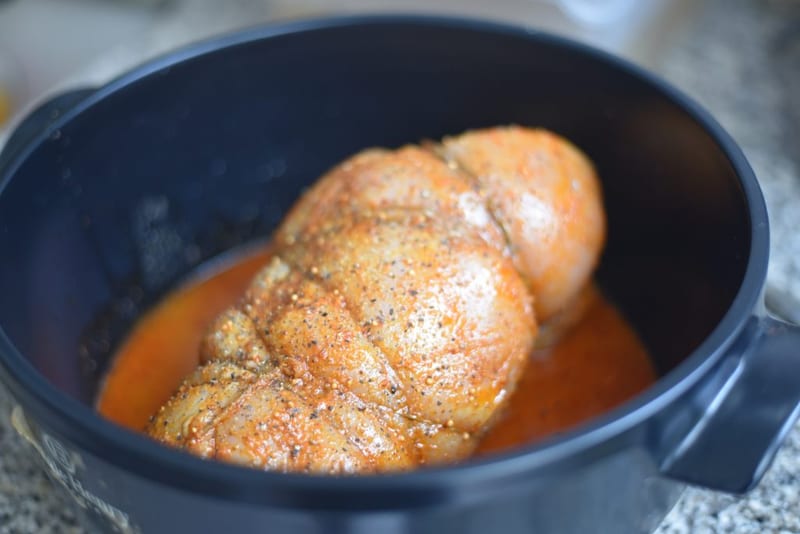
Method
- 1
making the brine· 48-72hrs.
Place all the brine ingredients in a big container, mix well and place the turkey inside. insert the container into the fridge for a minimum of 48hrs.
- 2
preparing the spice rub· 7 minutes
Place all the rub ingredients in a bowl and mix into a smooth paste.

- 3
coating and tying· 15 minutes
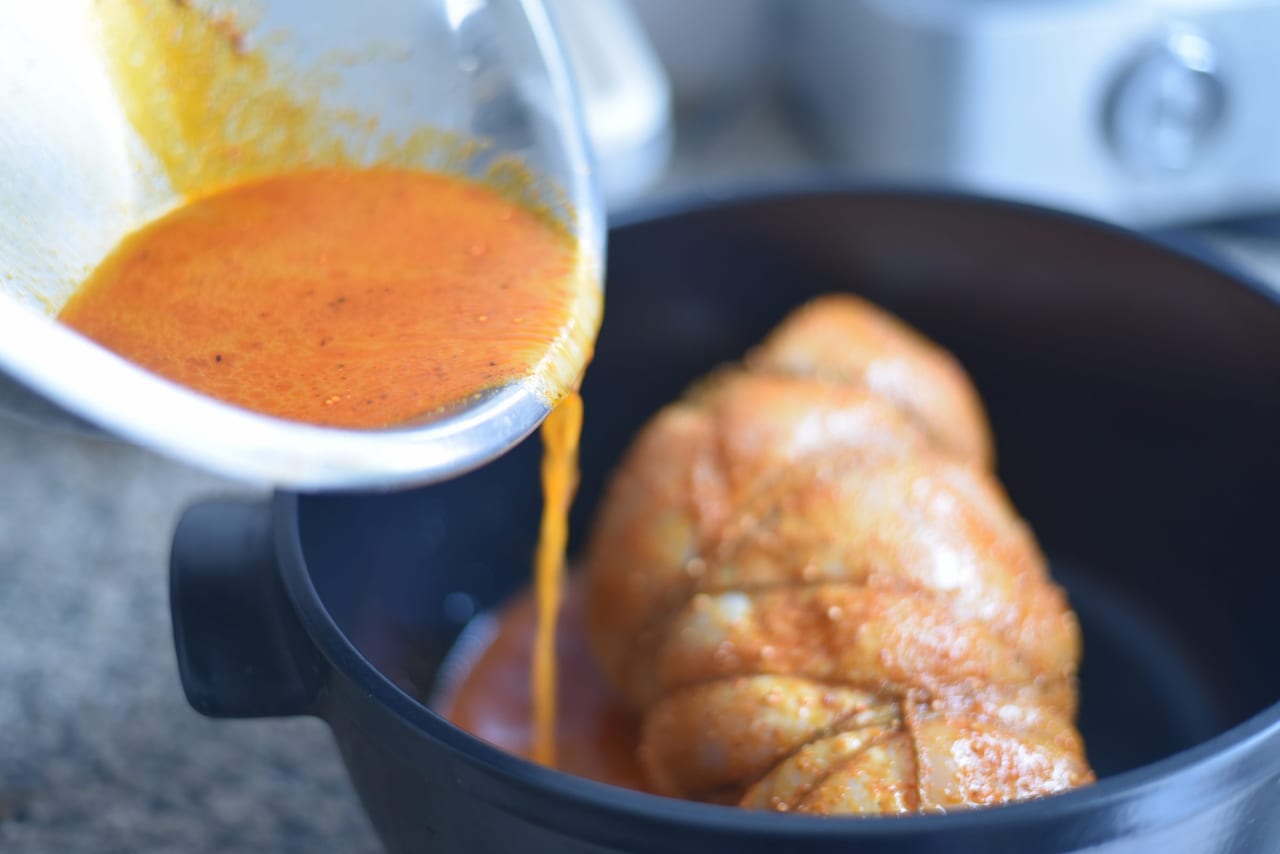
Preheat the oven to 140°c/ 280°F. Place aluminum foil on the counter, take the turkey out of the brine and place on the foil. Rub the turkey with the spice paste and tie in a continuous butcher’s knot or any other knot that will keep the 2 breasts tied together in an oval shape. Mix 1 cup of water with the leftovers of the turkey rub paste and pour into a Dutch oven, place the pastrami in the Dutch oven, so there is about 1 inch (2 cm) of liquids in the bottom.
- 4
baking and serving· 1 hr- 1hr 20 mins
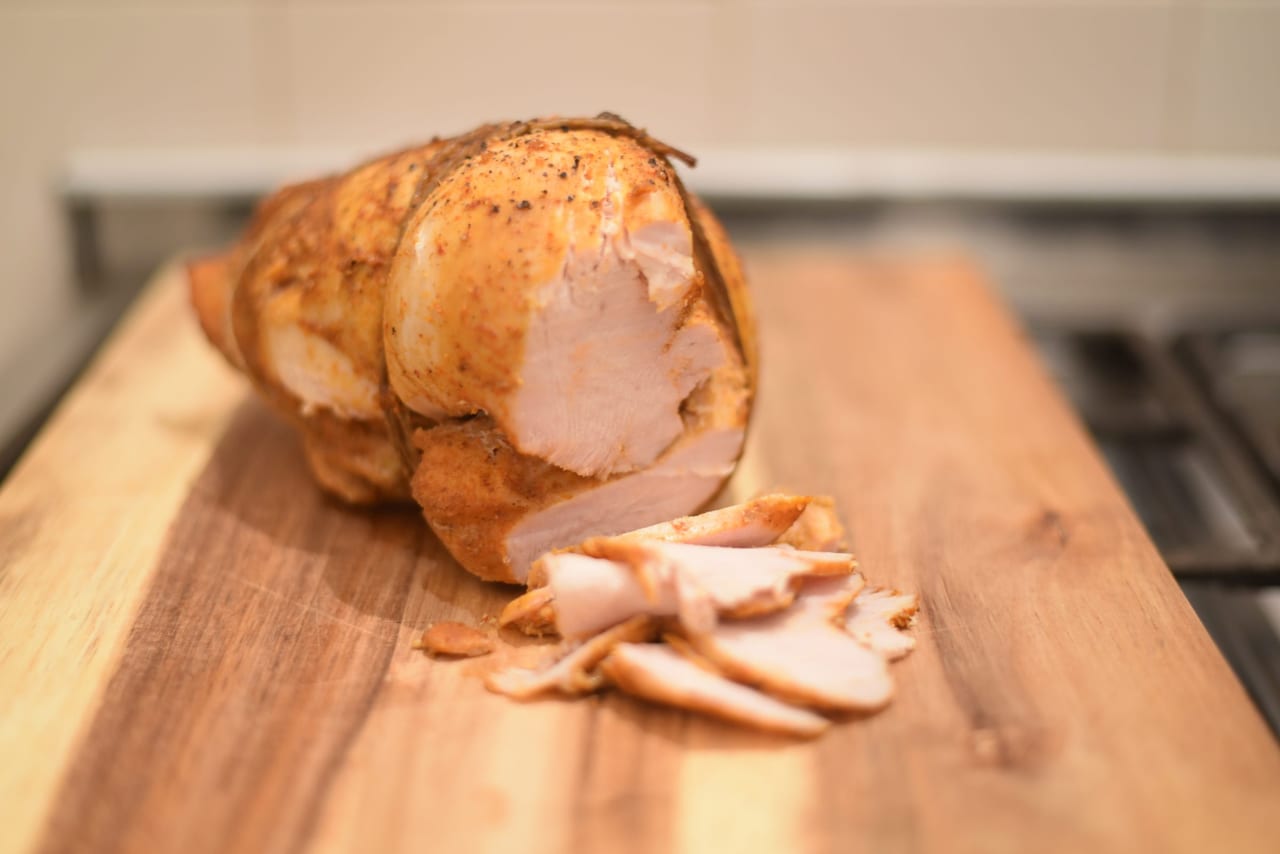
Cover the Dutch oven with the lid and insert into the oven. Check after 1 hour for the turkey's internal temperature, it should be about 80°c/ 170°F, if ready, take out, if not, check in 10 minute intervals. Take out the turkey and cool for 1 hour before serving. Remove the knot, slice thinly and serve. The pastrami can be kept in the fridge for up to 10 days covered with a plastic wrap after every use.


Jaron Kimhi
Jaron Kimhi — self-taught home cook from Tel Aviv, writing and cooking every recipe on this site himself. 20+ years of tinkering in the kitchen, leaning toward slow cooking, classic technique, and honest ingredients.
More recipes by Jaron →


